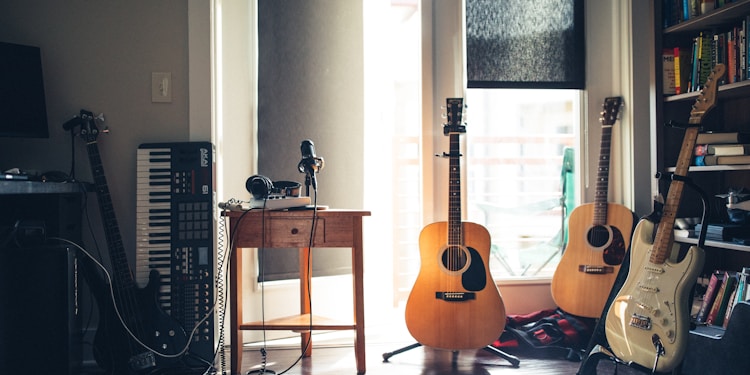
These days you don’t need to book expensive studio time to get some high-quality recordings. If you’re an aspiring artist or producer, you only need a laptop and minimal equipment to make incredible music from the comfort of your own home. It can be a daunting task at the beginning, but these 7 tips will help you on your way to being a home-grown recording artist.
- Use the internet as the ultimate resource
In this day and age, we’re incredibly lucky to have a wealth of information, knowledge, and resources at our fingertips. Many people, when starting to get into home recording, buy books on the subject. This can be a great way to start, no doubt, but anything you can find in these books is available on the internet. Not to mention, for free!
Our first tip is to take advantage of your access to the internet. If you came across our article then you’re clearly already on your way. But don’t stop here! For any questions that you may have in regards to the recording process or any topic you want to get a better understanding of, there are articles, tutorials, and videos about almost everything to do with home recording.
The best way to learn, in our experience, is by trial and error. So we recommend that you just get started and dive right into recording your music. Any issues you encounter along the way, just look them up. Visit the site MultitrackHQ.com for a wide range of how-tos, product reviews, and other information all about home recording.
- Decorate your room for recording
Treating your room for recording will yield better results when recording vocals in particular. If your room has bare walls and no carpeting, your microphone will be picking up all kinds of unwanted reverb from these reflective surfaces. Ideally, you want to avoid this boxy sound and add your own tailored reverb after the fact. This is a common issue associated with home recording.
In order to improve the quality of your recordings, the best way is to acoustically treat the walls around your microphone. By improving the acoustics of your recording space, you will get a purer sound without all that excess noise bouncing around the room and into your microphone.
There are many “budget” options you can do rather than redecorating your whole recording space with 2-inch Rockwool insulation. A simple duvet hung behind the vocalist will improve the sound quality drastically. The thicker the duvet or blanket, the better it will absorb sound. Just try to cover any large walls or surfaces in order to “deaden” the acoustics of the room as much as possible, and you’ll get much cleaner recordings.
- Use a good pair of headphones and monitors
Any producer or mixer worth their salt will tell you about the importance of using decent headphones and monitors. When recording, a good pair of closed-back headphones is essential. Although these might not sound as great as a pair of open-back headphones, using a pair of closed-back headphones will minimize headphone bleed when recording using a microphone. Although you don’t need to break the bank and get the most expensive headphones on the market, it’s surely a worthy investment to buy two pairs of headphones if you’re recording with another artist.
Again, with monitors, you don’t need to fork out thousands of dollars to get a decent set. When it comes to mixing your tracks, it’s a good idea to listen to them from multiple sources, not only your headphones and monitors. Take your tracks into your car and play them on the stereo, and listen to them through your laptop speakers too. This will give you a clearer sense of how it should be mixed to balance the sounds for a variety of different sound sources. Not everyone is going to be listening to your music on the best headphones or sound systems once you release it out into the world, so you want to take this into consideration.
- Use a decent preamp
Some people find that when they plug their microphones or guitars into their interface, the sound they get tends to be thin and transparent. To get the warmth and punch back into your recordings, you can use a preamp to increase the gain of your input signal. Preamps, like a lot of audio equipment, can vary wildly in price. But again, you don’t need to spend too much to get a decent sound from a preamp. For microphones, in particular, a preamp is needed to boost the signal to line level. Oftentimes, microphones need a lot of gain, around 30 to 60 dB to get the signal to a usable level. Guitars, on the other hand, only require 20 to 30 dB. Other types of recording equipment such as compressors and equalizers require a louder signal to use, which would require a preamp to boost the level.
- Manage noisy equipment
Noise can cause trouble when it comes to recording, especially if you’re doing so outside of a controlled studio environment. Noisy electronics, hard drives, and air conditioners can all cause annoying noise that can show up in your recording. These are all in your control though and can either be switched off or moved away from your microphone’s pickup pattern. Noise from traffic, roommates, and other things that are out of your control, on the other hand, can be fixed using software such as RX 9 Advanced by iZotrope. This is a tool that can clean up and repair any audio, and it is used by professionals as well as bedroom producers alike.
- Learn basic mic techniques
For recording vocals, you would typically position the microphone 6 to 12 inches away from the singer’s mouth. To capture more of the low to mid-range of the singer’s vocals, you may want to take advantage of the proximity effect and move the mic closer to the sound source. If the room has a great reverb that you want to capture, you can try moving the microphone further away. Make sure to look at the polar pattern of your microphone in the instruction manual, as this should inform you of the best way to position your microphone.
- Get organized!!
This tip is more all-encompassing than the others. Being organized is so important in order to work effectively and efficiently. This means organizing and storing your equipment and cables properly and organizing your audio files and project sessions in a sensible and deliberate manner. This will save you so much time in the long run.
Final thoughts…
You don’t need a limitless budget to make the music you love. We hope that these 7 small tips give you some insight into the possibilities of recording music from home. For all those aspiring artists and producers, keep being creative and honing your skills, as learning is a lifelong process.


