How to Add Lights to Power Wheels: Step-by-Step Guide
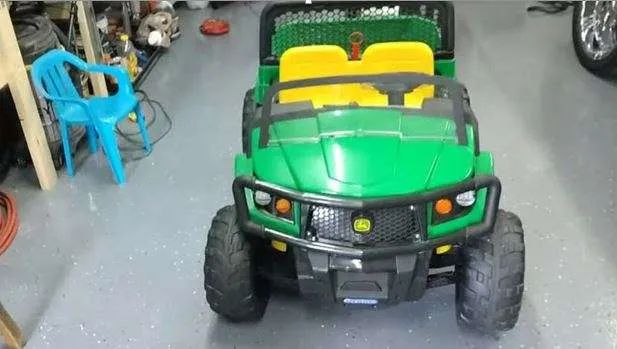
Adding lights to a power wheel makes it look cooler as well as safe for driving in the dark. But how to add lights to power wheels?
You can add lights to power wheels by following some simple steps. First, add a distribution block and then do some wiring to connect them to either headlights, tail lights, or LED strip lights.
We will explain everything in detail throughout the article. Whether you have a parental control ride on car, two or four-wheeler, or any other battery-powered ride-on toys, you can follow this step-by-step guide.
Things You Will Need to Add Lights on Power Wheels

Before you start working on your power wheels, make sure you have the following items ready:
- Lights of your choice
- Distribution block
- Toggle switch
- Voltage step down regulator*
- 18 gauge wires (12v)
[*You need a 12-v battery source for powering the lights. If your power wheel has higher power, you can either add a voltage step down regulator or install a separate 12-volt battery]
Additionally, you will need the following tools to add lights to ride on cars:
- Soldering iron
- Screwdriver
- Wirecutter
- 3M double-sided tape
- Electrical tape or glue gun
Once you have all the things ready, start working following the instructions in the below part.
How to Add Lights to Power Wheels: Step-by-Step Guide

Although adding lights to battery-powered or electric power wheels is easy, you will need a little bit of technical knowledge of doing electrical work. Basic ideas will be enough for carrying out this job.
Follow the steps below to add lights to power wheel cars:
[Precaution: Work with clean and dry hands to avoid electric shock.]
Step 1: Select Lights of Your Choice
We have mentioned choosing lights in the above part, but this needs a detailed explanation. First, you need to decide if you want to add headlights, tail lights, or LED strip lights.
If you need a better view in the dark for driving, a headlight is what you need. Taillights will illuminate around the car and make your kid’s ride fun.
On the other hand, LED strip lights will give power wheels cooler looks. You can go for one of these three options or add all three lights.
In case you need headlights or tail lights, you can go for individual LED lights or LED bars. Both look awesome, and it is up to your personal preferences.
Step 2: Adding a Distribution Block
A distribution block helps to get several power outputs from a single input. It also keeps the wiring organized and clean.
The main purpose of adding the distribution block to the power wheel jeep is to use the outputs to connect to multiple lights. If you are installing only one light, you may avoid adding the distribution block.
Usually, distribution blocks include one or two inputs. Open up the battery compartment and add the wire from the battery output to the input. Then attach the block to a space around the battery.
Step 3: Add Headlights to Power Wheels

After installing the distribution block, you can move onto wiring and set up the lights. Before that, decide exactly where you will set the headlight.
If there’s a dedicated location for headlights, that’s great. Or else, select a place on the front side and mark it with a marker.
Then attach the wires to the output of the distribution block. You are likely to use at least two lightbulbs here, and that’s why using a distribution block is helpful. Direct the wires towards the position of the lights.
You can move the wires through the interior or on the outside. We recommend using the interior as it hides the wires. Making a few holes may be necessary for this.
Direct the wires first to the dashboard of the power wheels. Install a toggle switch there to control the power of the lights. Then move wires towards the lights for connections. Attach the wires on the vehicle’s body with electrical tape.
After installing the lights, don’t set up the parts of the ride on the car. Check if the lights are working fine. If everything is okay, reinstall all the parts and let your children have fun.
Step 4: Add Tail Lights to Power Wheels
Adding tail lights is similar to installing the headlights. This time you only need to change the direction of the wire to the back.
The great thing about installing tail lights is that you have the option to add colorful lights. Our experience says blue lights and red lights are most favorite to kids.
Using a LED light bar is also a good option here. You can hang the LED bar to the back of the remote control ride-on car.
Similar to the previous step, add a toggle switch on the dashboard and install the lights. Fix them well, so they don’t fall off while driving.
Step 5: Add LED Stripes to Power Wheels

In today’s modern world, the use of LED strips is quite popular. You also can add them to the interior of the power wheel to make it look cooler.
Don’t go for cheap strips as the adhesive on those is low quality. They will come off within a few weeks. Get good quality LED strips to let your kid drive with ease.
After connecting the wires with LED strips, attach them to the car’s interior in the way you like. You may also add some on the outside if you prefer.
Then turn on the switch to see if the lights are working. We are sure your kids will love the new look.
[Note: You must follow step 1 & 2 for adding lights. Depending on your preferences, you can go for either steps 3, 4, or 5, or all of them. Due to installing the distribution block, you won’t have a problem getting output even if you install all three lights.]
Conclusion
We hope you have understood the instructions for how to add lights to power wheels. The process is pretty simple, but the result is excellent. It will make your kid’s driving experience better.


